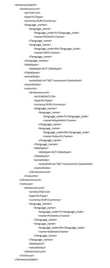
Location: Units (task ID: DimensionMntYearly)
You can save units from the system to an XML or CSV file. For example, you can copy an existing hierarchy which you can then use as a basis for a new one by importing it to a new hierarchy.
All data of all units in the selected year, hierarchy and dimension is saved, including the periodical settings of units in the active hierarchy. The units in the "Units not in use" section are not saved.
You can add new units to the system and update existing unit data by using an import file. For example, you can create a new unit hierarchy based on an existing hierarchy by saving the existing unit hierarchy to a file (see Copying Existing Unit Hierarchies), importing it to a different dimension and year, and saving it as a new hierarchy.
To import units:
1.Prepare the import file. The imported file can be an XML or CSV file (for examples, see Example of an XML File and Example of CSV File).
Note! Use semicolon (;) as the data delimiter in the CSV file. If you edit the CSV file in Excel, remember to save it as a CSV file. Note also that you must always use comma as the decimal delimiter (in both the XML and CSV file) regardless of your system's regional settings.
2.Click ![]() Import and find the import file.
Import and find the import file.
3.Under Import type, select one of the options:
•If you select Update units, only the units that are included in the imported file are changed in the system. Those units that are not included in the file remain as they are.
•If you select Replace units, all units that are not included in the import file are deleted from the system. The same restrictions apply as when deleting units manually in the Units view (see Managing Units).
Tip! When only one hierarchy needs to be updated (not the whole dimension), move the top level unit to Units not in use. The whole hierarchy is removed from the dimension. Then import the file using the Update units option. Do not use the Replace units option because it removes the units that do not exist in the file from all hierarchies of the selected dimension.
4.Click Start Import.
5.In the Units view, click ![]() to save the changes.
to save the changes.
•Unit ID and unit consolidation method (field name TYPE) code (Full Consolidation=0, Proportional consolidation=1) are mandatory in the import file. •Consolidation method cannot be changed using import, the method is only altered when creating a new unit. •If the currency setting is missing from a unit, the group currency is used as the default currency. •Units that do not have a valid parent in the active tree are placed in the Units not in use section. This may occur when a new unit is added with invalid parent data, or if a consolidation unit is deleted or moved to the Units not in use section. •When an existing consolidation unit is moved to a different location in the hierarchy in the import file, also all its sub-units that are not included in the file remain under the same parent and are moved to the new location. |
If any problems occur during the import, a note appears in the import dialogue box and in the upper left corner of the Unit Management view. •To view the list of warnings and their descriptions, click the Show warnings link in the Import Units dialogue box (or the errors and warnings link in the Unit Management view). •If you want to continue the import regardless of the errors, click OK in the Import Units dialogue box. Then save the changes in the Unit Management view. •To copy the error and warning texts to the clipboard, click Clipboard in the Errors and Warnings dialogue box. •The errors and warnings list remains in the view until you clear the warnings. Click Clear All or select the errors and warnings you want to clear and click Clear Selected. |

